Start A Shadowsocks-Rust VPS With Podman or Docker
Buying The VPS
- I will be buying Vultr they offer a decent server for a cheap price.
- If you plan to use something other than Vultr make sure it’s a reliable, reputable service.
Let’s start by going to Vultr’s website and making a new account.
- Vultr offers $250 USD in credit for free to new customers here.
On your homepage at the top right there will be a “Deploy” button, press that, and press deploy new server.

I’ll be deploying the cheapest option for $5 USD this should be enough for most people, you’ll get 1TB of bandwidth monthly.
Select “Cloud Compute – Shared CPU”.

Select the location, for fast speeds and low ping the closest location to you will be the best.

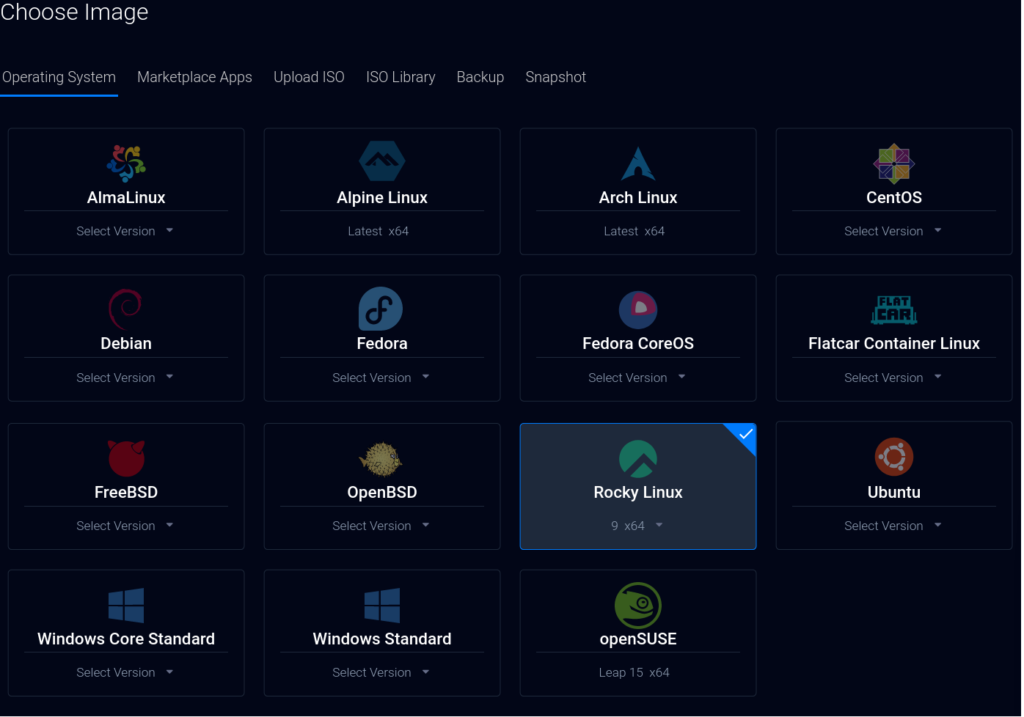
Choosing the OS is up to you, just pick a standard Linux distribution, I’ll use “Rocky Linux 9”.
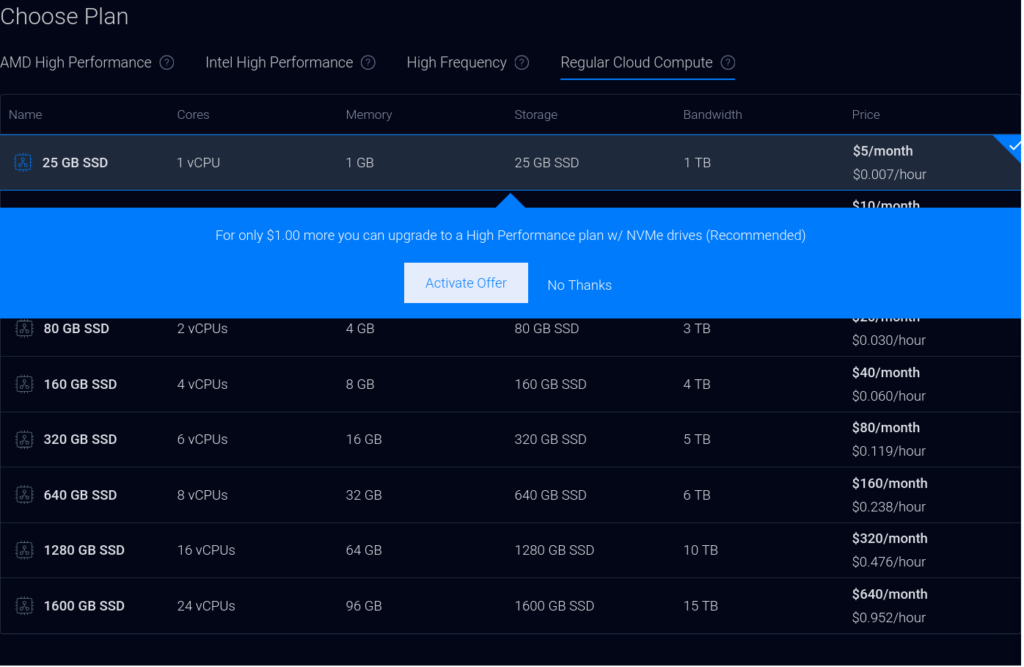
For the plan, select “Regular Cloud Compute” and choose the cheapest option. If you get an offer like I did, say “No Thanks”.
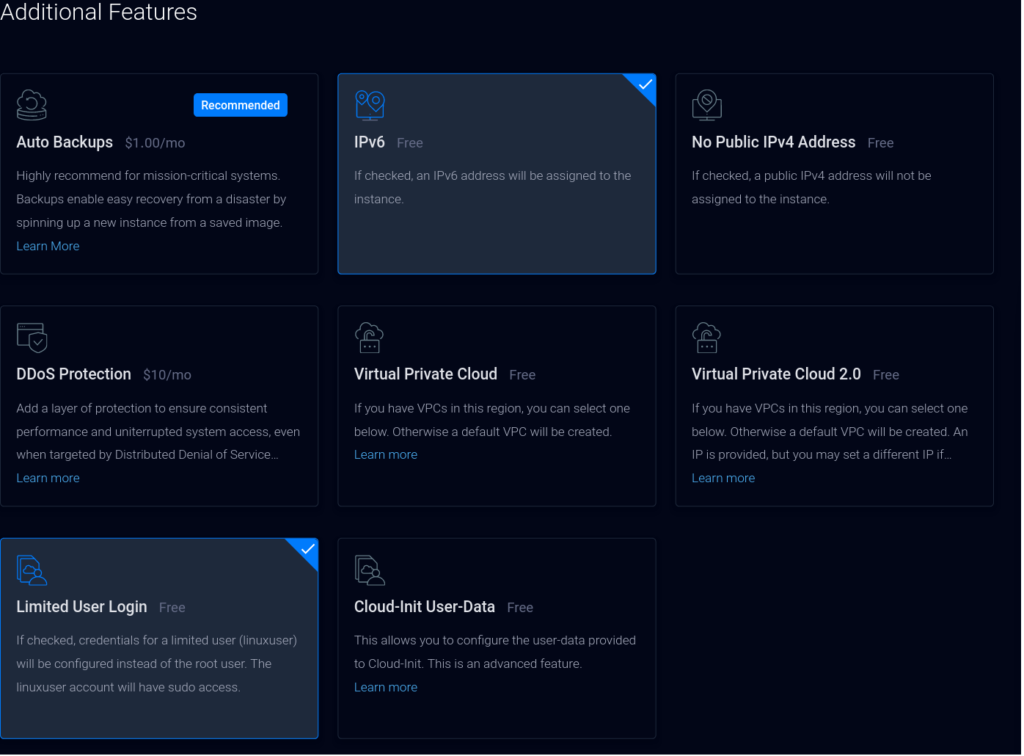
On “Additional Features” disable “Auto Backups” then enable “IPv6” and “Limited User Login” which will save you the hassle of creating a user account.
For “Server Settings” you can ignore this for now.

Give the server a hostname and label, this can be whatever you want.

The last thing to do is hit deploy at the bottom.

The server will start deploying, you can see that after you click on the “Compute” tab to the left.

Logging into your VPS, updating it & installing Podman or docker
SSH Into The VPS
With MacOS or Linux, you can SSH into your VPS by using the terminal.
On Windows, the recommended SSH tool is PuTTY, but PowerShell also has SSH.
Before you SSH into the VPS, you’ll need the IP and the user password.
Head over to the “Compute” tab and click on your VPS name.
You’ll see the VPS IP address for IPv4 and IPv6 also your user account information.
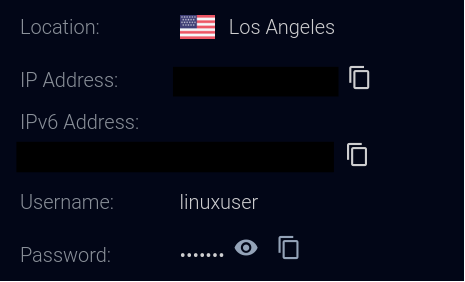
In terminal, run ssh linuxuser@YOURSERVERIP and enter your password.
Updating The VPS & Installing Docker Or Podman
After you logged into the VPS first update it, run sudo dnf update after the update finished run sudo systemctl reboot, SSH into the VPS after the reboot and run sudo dnf install podman, but if you want to use Docker follow Dockers installation instructions here.
Creating The Shadowsocks-Rust Server
I’ll be using Podman, but if you use Docker it’ll be similar since Podman is a 1:1 to Docker, just replace “podman” with “docker” in commands.
In terminal run podman pull ghcr.io/shadowsocks/ssserver-rust:latest, this is an official Shadowsocks-Rust server image.
After the pull, we’ll create a configuration file, run nano config.json and paste in what I’ve left below.
{
    "server": "0.0.0.0", # This has to be 0.0.0.0 for Podman or Docker.
    "server_port": 8388, # Choose any port, 8388 is the default Shadowsocks port.
    "password": "", # Use a strong password.
    "method": "chacha20-ietf-poly1305"
}
Server NAT
Some VPS providers will put your server behind NAT, which is fine you’ll still be able to use your public IP. We just need to make sure what kind of IP your server has so we can configure the Docker container properly.
In terminal run
ip -4 addr show scope global | grep inet | awk '{print $2}' | cut -d/ -f1 | head -n1.
Keep note of the IP that was outputted.
Running The Container
- In the command below replace “THEOUTPUTTEDIP:8388:8388/tcp” with the IP that you took note of. Example: “123.123.123.123:8388:8388/tcp“
- If your system has SELinux then sometimes you’ll need to add “:Z” at the end of the bind mount. Please try without “:Z” and if you notice the container doesn’t work then try with “:Z”.
If you need “:Z” replace “-v ~/config.json:/etc/shadowsocks-rust/config.json” with “-v ~/config.json:/etc/shadowsocks-rust/config.json:Z“
You can now run podman run –name ssserver-rust –restart always -p THEOUTPUTTEDIP:8388:8388/tcp -v ~/config.json:/etc/shadowsocks-rust/config.json -dit ghcr.io/shadowsocks/ssserver-rust:latest after it runs your Shadowsocks server is on, but you can’t connect to it yet.
Firewall
The final step is to open the 8388/tcp port. Please refer to Vultr’s documentation if they are your VPS provider. If you use a different VPS provider you need to open up the port from their panel/website.
As for the OSes firewall like UFW and Firewalld, Docker will bypass the OS firewall so don’t worry about it. However, Podman will not so you’ll need to open up the port.
Depending on what you use here are the commands for UFW and Firewalld, if you don’t know which firewall you have just try both commands and see which one works.
sudo firewall-cmd –permanent –add-port=8388/tcp && sudo firewall-cmd –reload
sudo ufw allow 8388/tcp && sudo ufw reload
Using Podman create an autostart systemd service
- If you are using Docker, this doesn’t apply to you, Docker will start Shadowsocks automatically.
In terminal, run podman generate systemd –new –name ssserver-rust, copy the output, and run cd /etc/systemd/system then run sudo nano ssserver-rust.service and paste it in.
Now enable the service by running sudo systemctl enable ssserver-rust.service.
Finishing up
Restart the server and make sure everything works by connecting to it.
I also recommend securing your server.
To use the Shadowsocks server safely, you need to proxy your DNS server when connecting from your browser, this is what it looks like in Firefox.
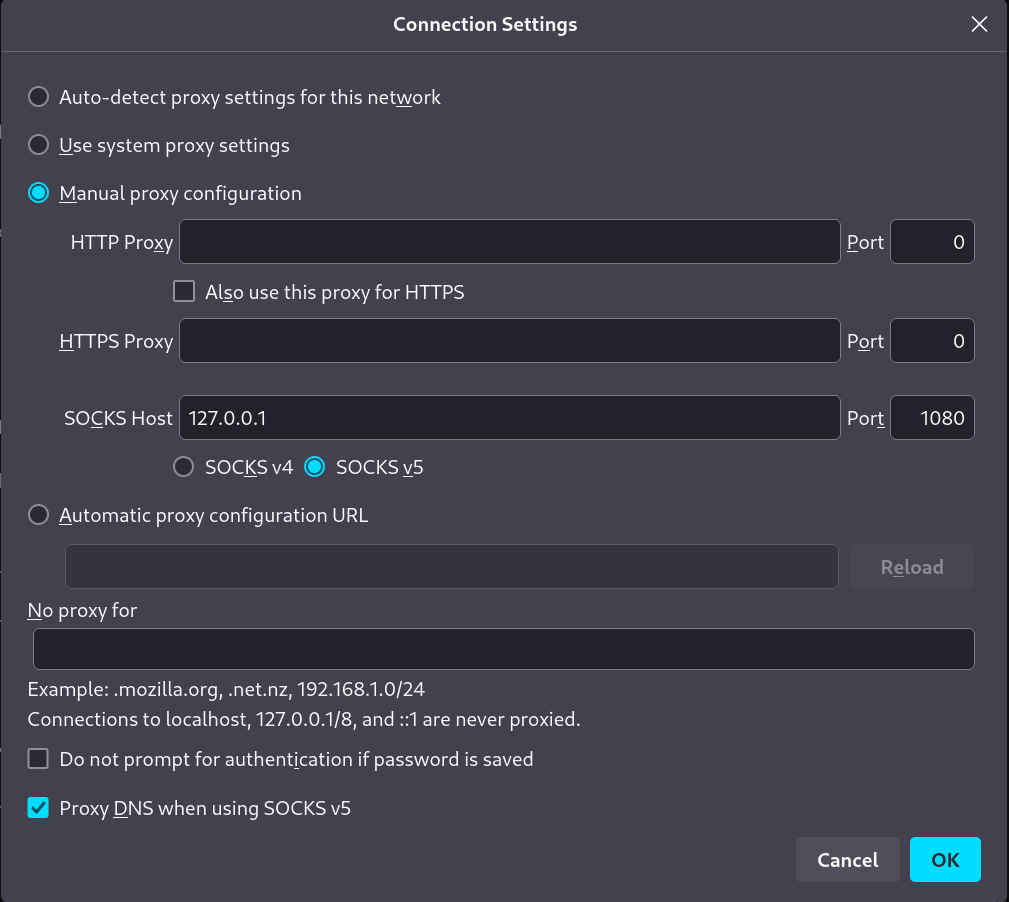
Make sure it is proxying your DNS by running a DNS leak test here. If the results are anything but Vultr’s DNS, you have a DNS leak.
Also, if you need something simpler, my guide for using IVPN’s V2Ray servers without their app or something more serious, my V2Ray guide.